Note
Before changing the DNS settings on your router, make sure you have created a DNS device on the NetAngel Dashboard with the public IP address of your network.
WAN Settings
- Open a web browser and type in 192.182.1.1 or 192.168.0.1 and hit “Enter”.
- Enter the administrator username and password (this can typically be found on the back of your router).
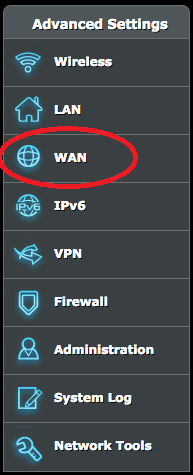
- Under “Advanced Settings” on the left-hand side, find and click “WAN”.
Enter NetAngel DNS Addresses
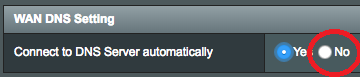
- Under “WAN DNS Setting”, find “Connect to DNS Server Automatically” and click “NO”.
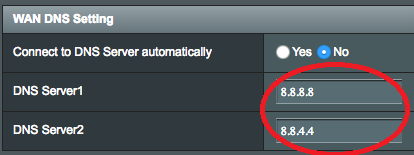
- Two fields will appear: DNS Server 1 and DNS Server 2. Type 54.70.46.42 into the first one and 54.70.76.29 into the second one.
- Click “Apply” at the bottom to save changes.
- Reboot your router and devices (computer, smart phones, tablets).